Friday, 23 October 2015

OUGD504 - Print Finishes

Varnishes

Varnish is often associated with wood. However, what you may not know is that varnishes are also used on paper.
Paper varnishes are applied to paper stock to give the page a smooth and consistent texture as well as having the added benefit of sealing the printed material to help preserve it better.
High-quality books and magazines usually have a paper varnish applied to their pages.
Varnishes can be glossy, as the example below show

Or Matte (Below):

Typically, varnishes are applied to the entire printing surface when a page needs to be robust but without adding too much weight to the paper stock, making it suitable for magazine pages, magazine covers, and brochures.

Lamination

Lamination adds a layer of protective coating (usually some type of plastic), often glossy or matte, to the printed surface while also improving its sturdiness and water resistance.
Lamination also has the added benefits of improving the tactile feel of the of the printed surface, lending it a smooth finish.
If a high gloss laminate is applied to the printed surface, photos and images appear to have more contrast and have better sharpness, as shown below:
image_15_lamination
Matte laminated prints are more subdued but add a very luxurious and elegant finish to the printed surface:
image_27_lamination_matte
Lamination is not unlike varnishes. However, whether lamination or varnishes are to be used in a project is wholly dependent on your needs and your desired outcome.
Typically, lamination is used if sturdiness is required such as for business cards and soft covered books. Also, in my experience, lamination tends to be one of the more expensive print finishes.

Spot UV Varnish

Spot UV varnishes are paper varnishes applied to the printing surface and is cured or hardened by UV light during the printing process. This results in a glossy coating on the surface of your print, as shown below:
image_09_spot_Varnish
UV varnishes are usually used as a spot application where only specific parts of the page get a UV varnish.
OLYMPUS DIGITAL CAMERA
This effectively gives texture and focal interest to different areas of the printing surface while leaving other areas untreated.
image_13_spot_varnish
image_07_spot_varnish

Foil Stamping

Foil stamping is the use of a malleable metallic material applied to the print surface by using heat and pressure.
image_03_foil
Foil stamping adds reflective properties to various elements of your design and can serve to add a bit of luxury to your project.
image_22_foil
Typically, it is used on text and the logo on the page or when certain elements call for it.
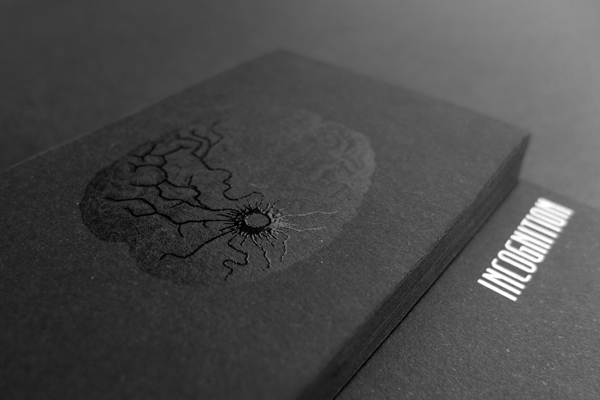
image_11_foil

Embossing

Generally, embossing refers to raising parts of the page for emphasis and texture.
image_18_emboss
This print finish adds physical depth to the embossed elements and thus, shadows and highlights are also produced in the design.
image_21_emboss
Embossing also adds a tactile dimension to your design. Images and text are literally felt.
image_20_emboss
Often, embossing can be combined with other printing techniques such as foil stamping to enhance the effects of both techniques.
image_19_emboss

Letterpress

Letterpress printing is one of the oldest printing techniques available. Some printers may call letterpress printing by the term debossing.
image1_letterpress
image_letter_press
A letterpress is used to depress or indent certain portions of the page. It can be seen as the opposite of embossing.
image_12_letterpress
Traditionally, the letterpress technique was used only for applying ink on a page as a form of relief printing and usually only for text. But it has evolved to also include pressing logos and other design elements directly into the paper substrate.
image_06_letterpress

Thursday, 22 October 2015

Level 5 Blogging Workshop

Level 5 Blogging Workshop

Today we had a blogging workshop. The first task was to find one blot entry from OUGD504 that is written in the first person (I, me, in my opinion) and then rewrite it in the third person. 

I changed one post about researching grids from;

1) " I started by researching grid systems as it was something I was quite unfamiliar with last year so I decided to research this first in order to eliminate any confusion with these when working on this brief."

2) "Grid systems are complex and aren't particularly clear unless you research them. To eliminate any confusion you need to research them in depth when working on various briefs. "

The second task was to find a blog entry where we have made a design decision based on a preference or aesthetic comparison. 

Task 2 - We were then asked to rewrite this entry using only objective, justifications for the decision - cultural,contextual,audience,communication,primary research, literature. 

1) " I then added a moustache to the logo to add an italian stereotypical reference linking to pizza's country of origin as well as adding a masculine representation of the person "Oscar"."

 2) "After researching more into italian stereotypes, this particular type of moustache was used a lot to communicate an italian representation as well as linking to their culture. That informed the decision to add a moustache to the logo to create an italian stereotypical reference linking to pizza's country of origin. The moustache also added a masculine representation of the person "Oscar". The moustache was effective in communicating the italian culture and instantly links the country to the target audience."


What is the difference between the following types of writing?

Describing
To describe is to give a detailed account in words of a particular matter.

Analysing
To analyse is to examine methodically and in detail the constitution or structure of (something, especially information), typically for purposes of explanation and interpretation.

- Evaluating
To evaluate is to form an idea of the amount, number, or value of; assess

- Contextualising
To place or study in context

- Theorising
To form a theory or set of theories about something

- Narrating
To give a spoken or written account of

Task 3 - Where we have made a series of small design decisions (often a stream of images)

Summarise and evaluate the accumulation of your design changes.

It is not necessary to document every slight change as much as it is necessary to explain and justify your design choices.

Task 4 - Write/Rewrite your latest blog entry following these guidelines..


Thursday, 15 October 2015

OUGD504 - Studio Brief 03

Studio Brief 03 - Type in Context Publication

Editorial Grid Systems

Grid systems are complex and aren't particularly clear unless you research them. To eliminate any confusion you need to research them in depth when working on various briefs. 


Five simple steps to designing grid systems - Part 1

The first part of this Five Simple Steps series is taking some of the points discussed in the preface and putting it to practice.Ratios are at the core of any well designed grid system. Sometimes those ratios are rational, such as 1:2 or 2:3, others are irrational such as the 1:1.414 (the proportion of A4). This first part is about how to combine those ratios to create simple, balanced grids which in turn will help you create harmonious compositions.

Starting with a blank canvas

It’s always easier in these kinds of tutorials to put the example in context, in some kind of real world scenario. So, this is it. You’ve got to design a programme for a gallery exhibition. You know you want the size to be A4. You also know that there are going to be photographs and text, and the photographs will be of varying size. There you have it - your blank canvas.

Subdividing ratios

The grid system we are going to design is a simple symmetrical grid based on a continuous division of the paper size in the ratio 1:1414. Using the paper size as a guide we can retain the proportion throughout the grid, this will give our elements within the design a relationship to one another, the grid and the paper size.

This is one of the easiest ways to create a balanced grid. By using the size of the paper as a guide we can divide using that ratio to begin creating the grid. You can see this through diagrams 1 - 6 that we begin by simply layering division upon division to slowly build up the grid.
{title}
{title}

Getting creative

Many have said grid systems can stifle creativity, but I disagree. Grid systems can facilitate creativity by providing a framework and already answer some designers questions such as ‘where should the folios go’, ‘how wide should the measure be?’ etc. A well designed grid system will go some way to answer these questions and more.

So, we have our grid. We can now begin to experiment with type areas, shapes and composition. We can explore how type and image will work together on the various types of pages our publication will have.

Diagram 7 shows the text area with the first elements of the access structure - running heads and folios. Diagrams 8&9 show how adaptable the grid is to various design options.{title}

After researching in depth it does help a lot and aids to an overall understanding of grid systems. Realising that a structure to design can help it become consistent especially when designing a publication. The reader needs a structure in order for the information to flow and to be easily legible. 

The effects of learning about grid systems, it enabled me to create this title page for my book by using this research.


OUGD504 - Studio Brief 03

Type In Context Publication

Today we were briefed on Studio Brief 03. To produce a publication based on the summer brief. "Type In Context." 

A 4 week brief.


Friday, 9 October 2015

OUGD504 - Studio Brief 02

Developing Oscar & Rosie's Logo


This design was created for a pizzeria therefore a simplistic vector of a pepperoni pizza was created. 
After researching more into italian stereotypes, this particular type of moustache was used a lot to communicate an italian representation as well as linking to their culture. That informed the decision to add a moustache to the logo to create an italian stereotypical reference linking to pizza's country of origin. The moustache also added a masculine representation of the person "Oscar". The moustache was effective in communicating the italian culture and instantly links the country to the target audience.

A monotone black and white vector was created however it didn't turn out as playful and effective as hoped.

Text was then added around the shape of the pizza, however it made the design look uneven and messy.


It made the design more complex and difficult to work with to add the text due to the uneven shape of the pizza, therefore the logo was rotated.

A font named Quartzo was used effectively as it is bold and extremely legible. However the design still didn't feel complete.

The & was then made a lot bigger and added a dark red ribbon with white text to create more depth and make the text "pop" 

Their slogan was added on the bottom in the same typeface to state exactly what it was. 

After having a feedback session with my peers then told me that the design was effective however it was very male dominated so therefore I added some pink lips to give a female representation of "Rosie." They also said that it will be good to sometimes separate these two as well as bringing them together. I did feel that the final design did look a bit cheesy, but who doesn't want a cheesy pizza right? 

The design was then added to a pizza box and a paper bag to give it a completed look.


Tuesday, 6 October 2015

OUGD504 - Studio Brief 02 - Establish Logo Design Requirements


Today we were briefed on studio brief 02 to create our own logo for any kick-starter project we liked. I therefore went on the website and started to browse through a few potential projects I found would be best suited for me to design a logo for. After looking at a few projects i decided I wanted to brand some form of food as I felt this would be best suited to the set of skills  had already acquired.

I found this gourmet pizzeria situated in Nottingham, UK names Oscar & Rosie's. I then went on their website and found out some information about them however there wasn't much and they hadn't even developed their menu yet. I analysed their original/existing logo and criticised it al ot due to the outlined sans serif font being very basic and and plain. I wanted to completely redesign their whole identity.


Friday, 2 October 2015

OUGD504 - Studio Brief 01 - Evaulation


Evaluation

To conclude I was very pleased with the outcome of my final leaflet.I used my previous knowledge linked with layout, folds, leaflets and the overall design process. This brief also allowed me to explore the process of design and how this can be applied to various design complications along the way. Working with a leaflet also helped me explore the creative process when designing leaflets and picking various folds at a commercial level. As a designer everything we produce should go through this process otherwise it might not be as effective and possible so learning this thoroughly throughout this project has enabled me to produce better quality work as an outcome.  Leaflets are in high demand for many businesses and organisations in order to deliver information to their customers and clients effectively, cheaply and quickly. Therefore it is important for a designer to understand basic folding styles and layouts when delivering information, something, which I have learnt whilst working on this brief. In understanding the design process I have made it very clear on my leaflet what things a designer needs to consider as well as showing that in my blog I have considered the financial, practical and time based considerations concerning leaflet designs and prints on a commercial level.

OUGD504 - Studio Brief 01 - Development/ Production with Feedback

Development

I started by experimenting with different folds but I eventually decided to stick with a simple Tri fold as i believe design should be effective and making the folding simple i felt this did this correctly. Also as I was aiming it at the Level 4 students I wanted the the leaflet to be simple but slightly interactive and the colours to be eye catching and vibrant so they would want to pick it up. I chose the colours, black orange and a slightly off white to tie into a building block styled theme similar to B&Q giving of connotations of building and structure within the design process. 

My front page I found was the most effective and this was recognised by my peers in the feedback session earlier today. They stated that the typeface for the title was bold and eye catching and the colours and shape used worked effectively in communicating structure.Therefore I decided not to change anything on the front page.
The inside pages I decided to use a serif font named Century in uppercase letters for my titles as I wanted to give it a traditional theme however in the crit I was told this contrasted with the front page and wasn't very effective. So I therefore decided to change all of the titles into the same font used on my front cover title, Futura condensed bold. I also changed the kerning slightly to make it more legible. I moved around some of the letters however I kept the lines used to keep the structure again tying into my concept. 


I created an easy to follow simple flow chart of step by step guide to the design process with words to prompt individuality within the design process and to make the reader think more deeply instead of giving all the information and explaining what each one meant. I used arrows to help the information flow but changed the colours after the crit as it was stated it initially gave of connotations of Halloween, something which I definitely didn't want. I decided to change the blacks to the off white colour to eliminate this concept immediately.


Within the production process I found it difficult to print the leaflet two sided effectively however through trial and error I corrected this and I was very pleased with the outcome.


I used the thin white paper in the printer as my stock as it was a cheap and effective material to use, especially due to the time constraints. It was also easily accessible and easy to fold.